Let's talk about neon...
We're breaking down more LowLife today and the subject of the moment is NEON.
When I first started thinking of the scene all I really wanted was to make something I could have fun creating and I wanted it to be kind of cyberpunk-y. Neon plays a key part in that look so I planned to have a lot of it in my scene. Let's go
Creation

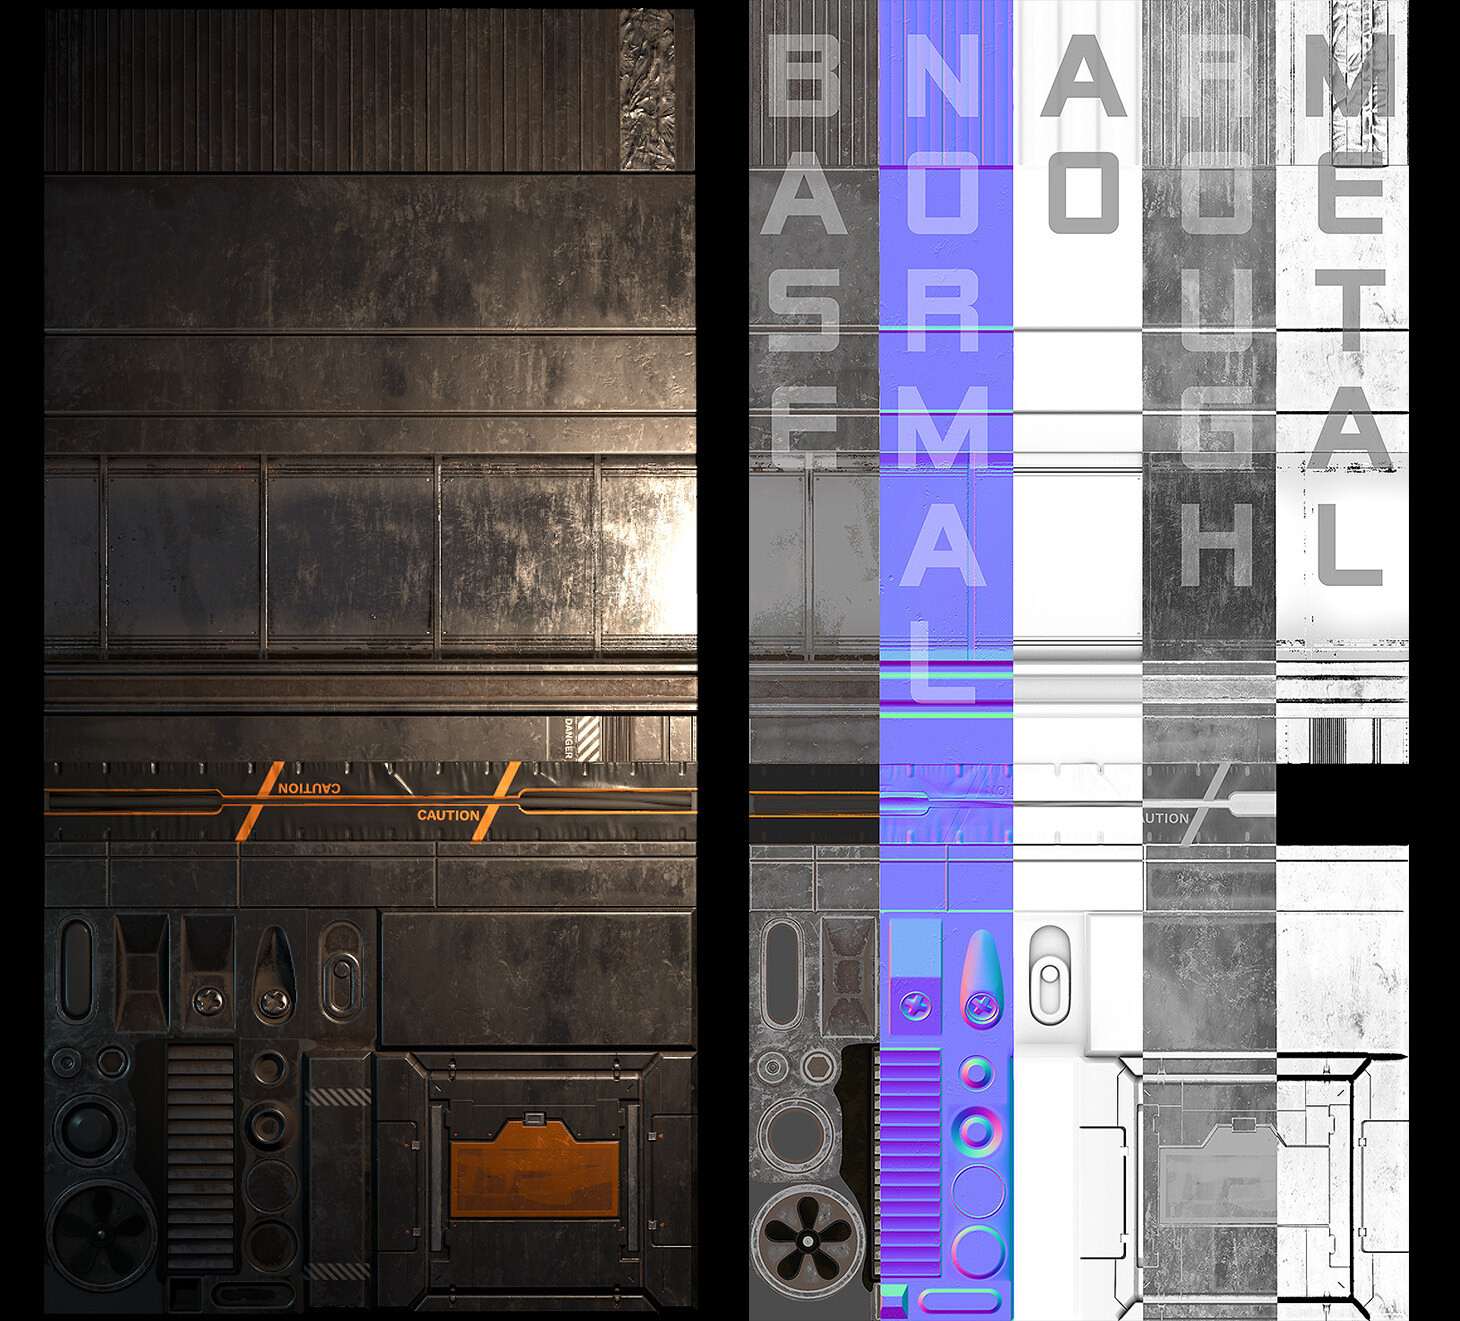
So first of all, the neon you're seeing here is rendered with just alpha cards with an alpha test shader. You'll be relieved to know the texture itself is a lot simpler than the Uber Trim and so is the shader. Here's the texture:

R, G, and B all over my body
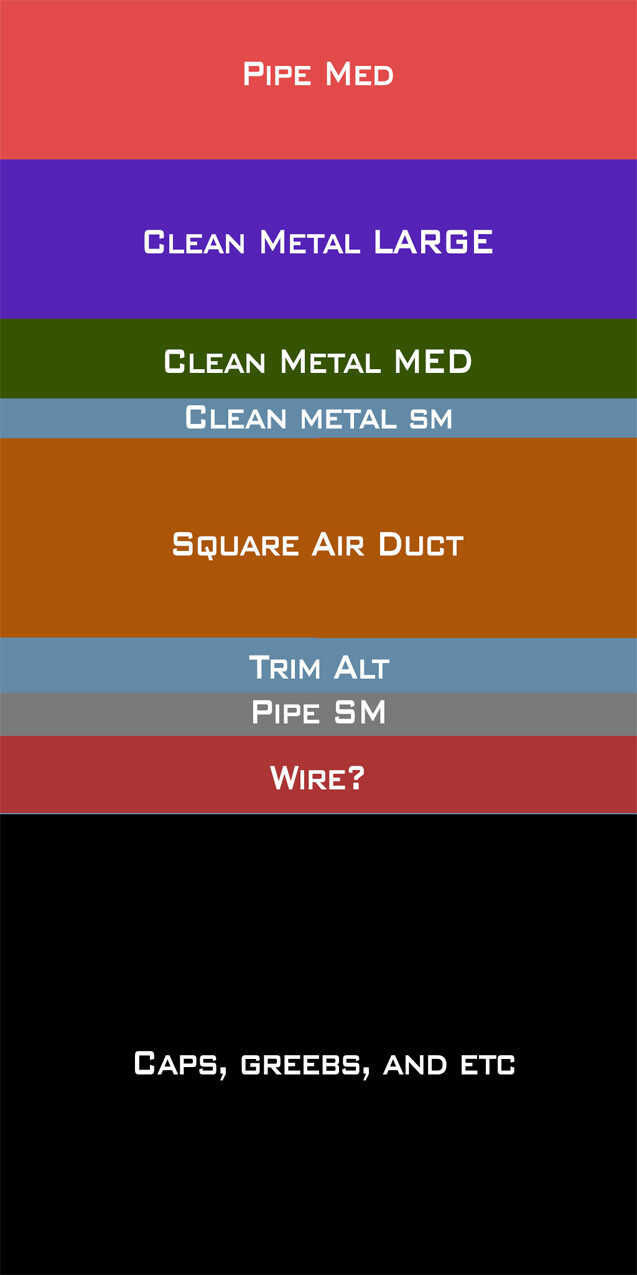
As you can see, like my previous grunge maps, it's also channel packed. On the right you can see the layer groups, color coordinated to help me keep track of things. For the channels, I generally used Red for lettering, Green for borders, and Blue for backgrounds or any third element. I also used Alpha for extremely rare circumstances (like, the one time) when I needed a fourth color. I made this mostly in Photoshop, using grouping and blending options to set the channel. You can do this by right-clicking on any layer or group and selecting "Blending Options". Under "Advanced Blending" you can find checkboxes for channels:

'Channels' is my 30th favorite word
Then turn off the channels you don't want for that group. It's super easy
Once that's made it's over to UE4 to work on the shader.
Shader

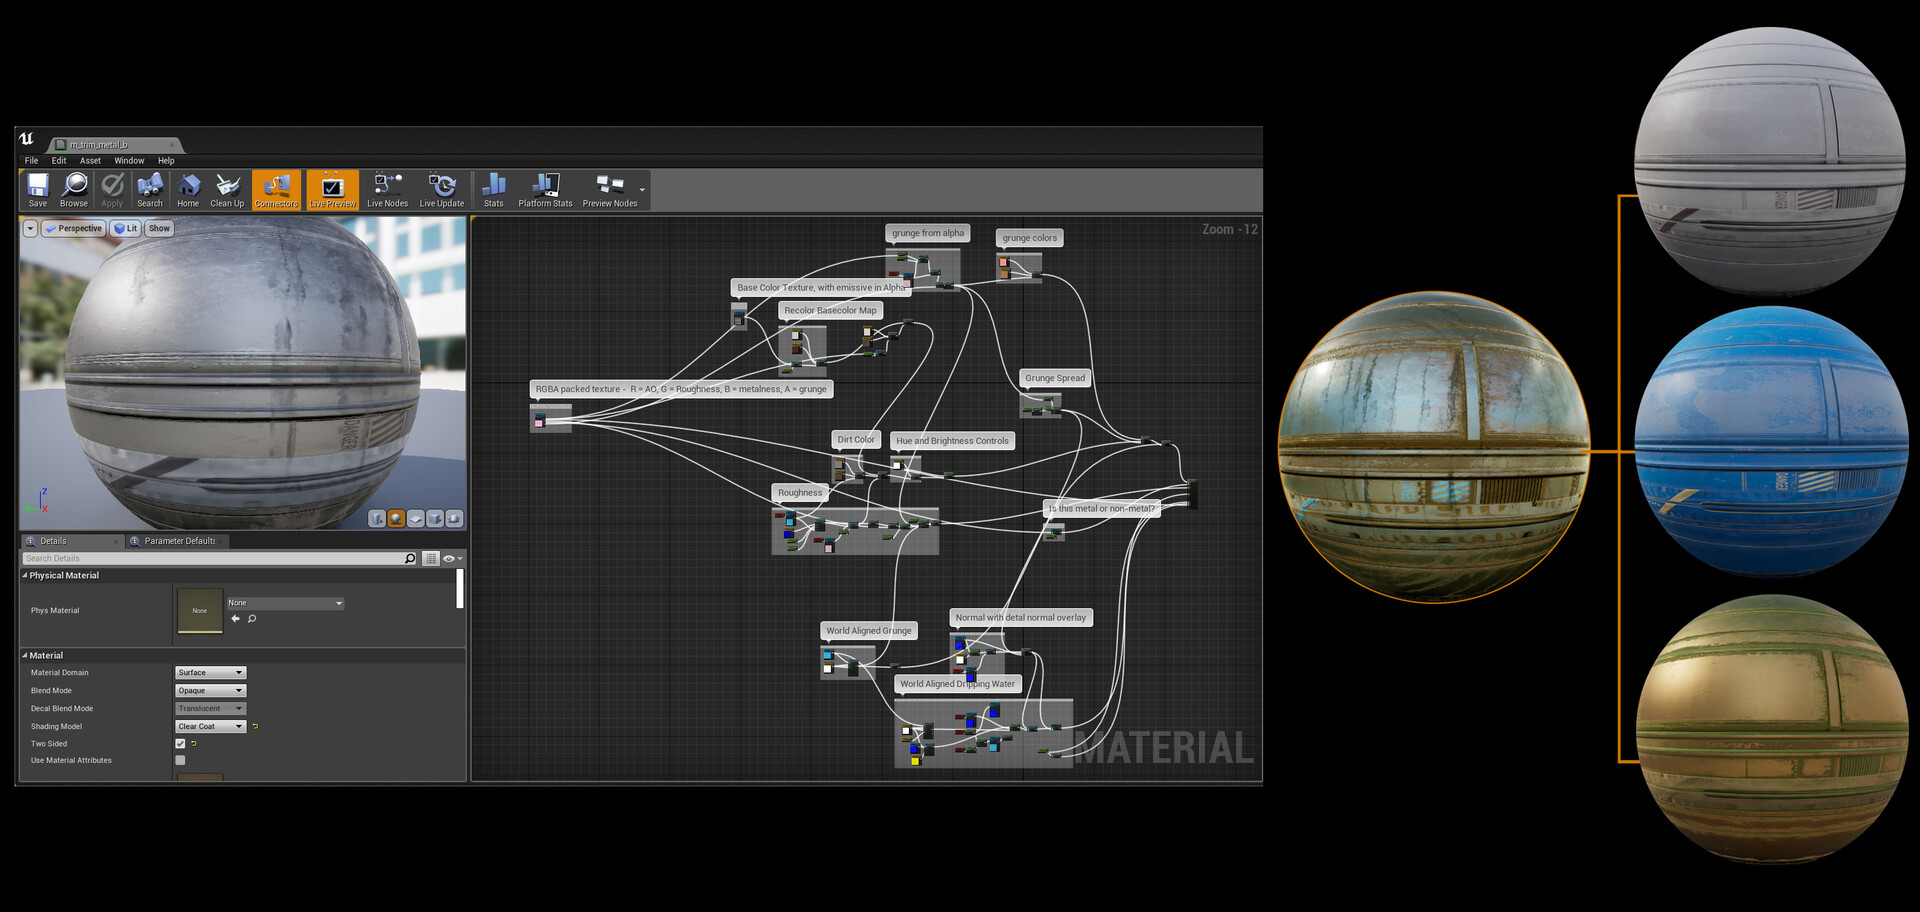
Well that's long image.
This looks more complicated than it is. I would say that: it ain't.
You're seeing four basic parts
- source textures with transforms (including a bump offset parallax)
- parameters for recoloring each channel mask
- different neon animations
- parameter switches for blending animations
Source textures
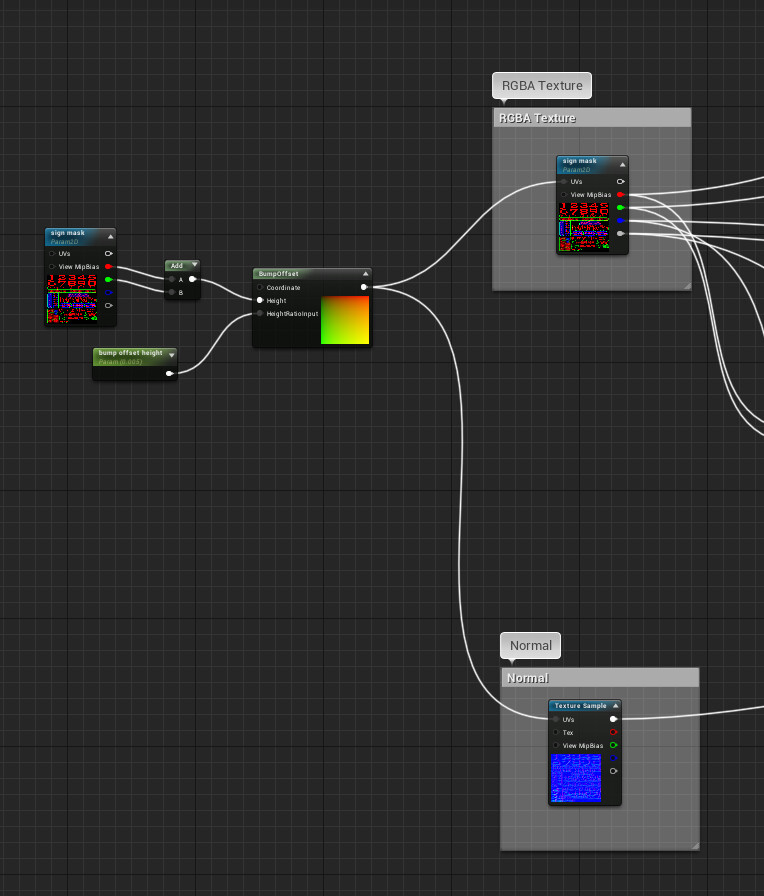
Nothing complicated here! The texture, it's normal, and a bump offset driven by the same texture. As simple as it gets.
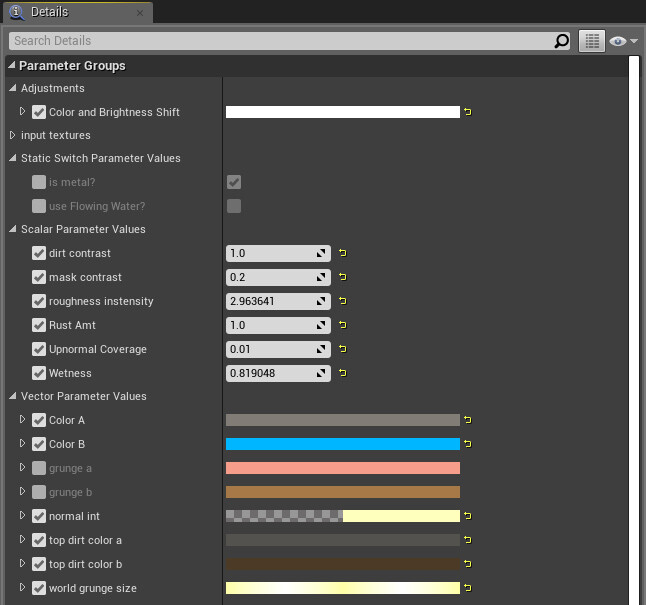
Parameter Colors

Parameterized colors for the signs. Also simple.
Animations
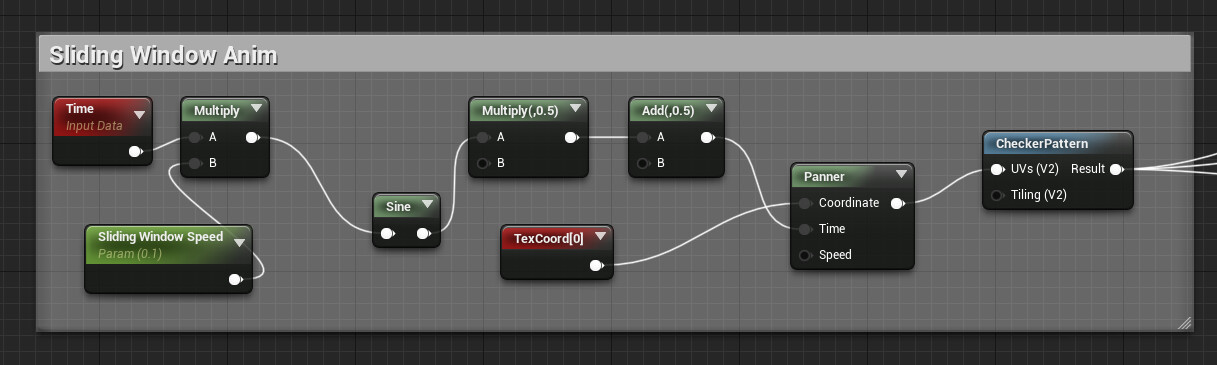
Some setup for animating the emissive of the shader. I have a few of these in the shader. Also... SIMPLE
Switches
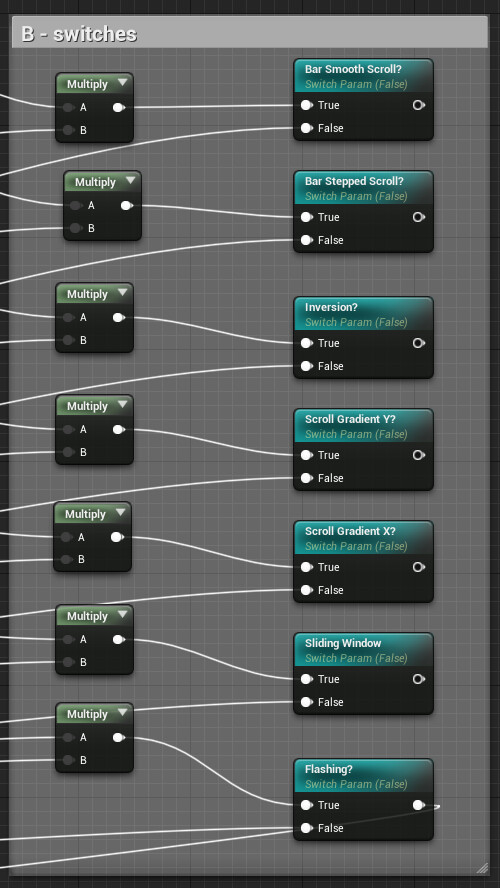
Parameter switches for the animations. SIIIIMPLE
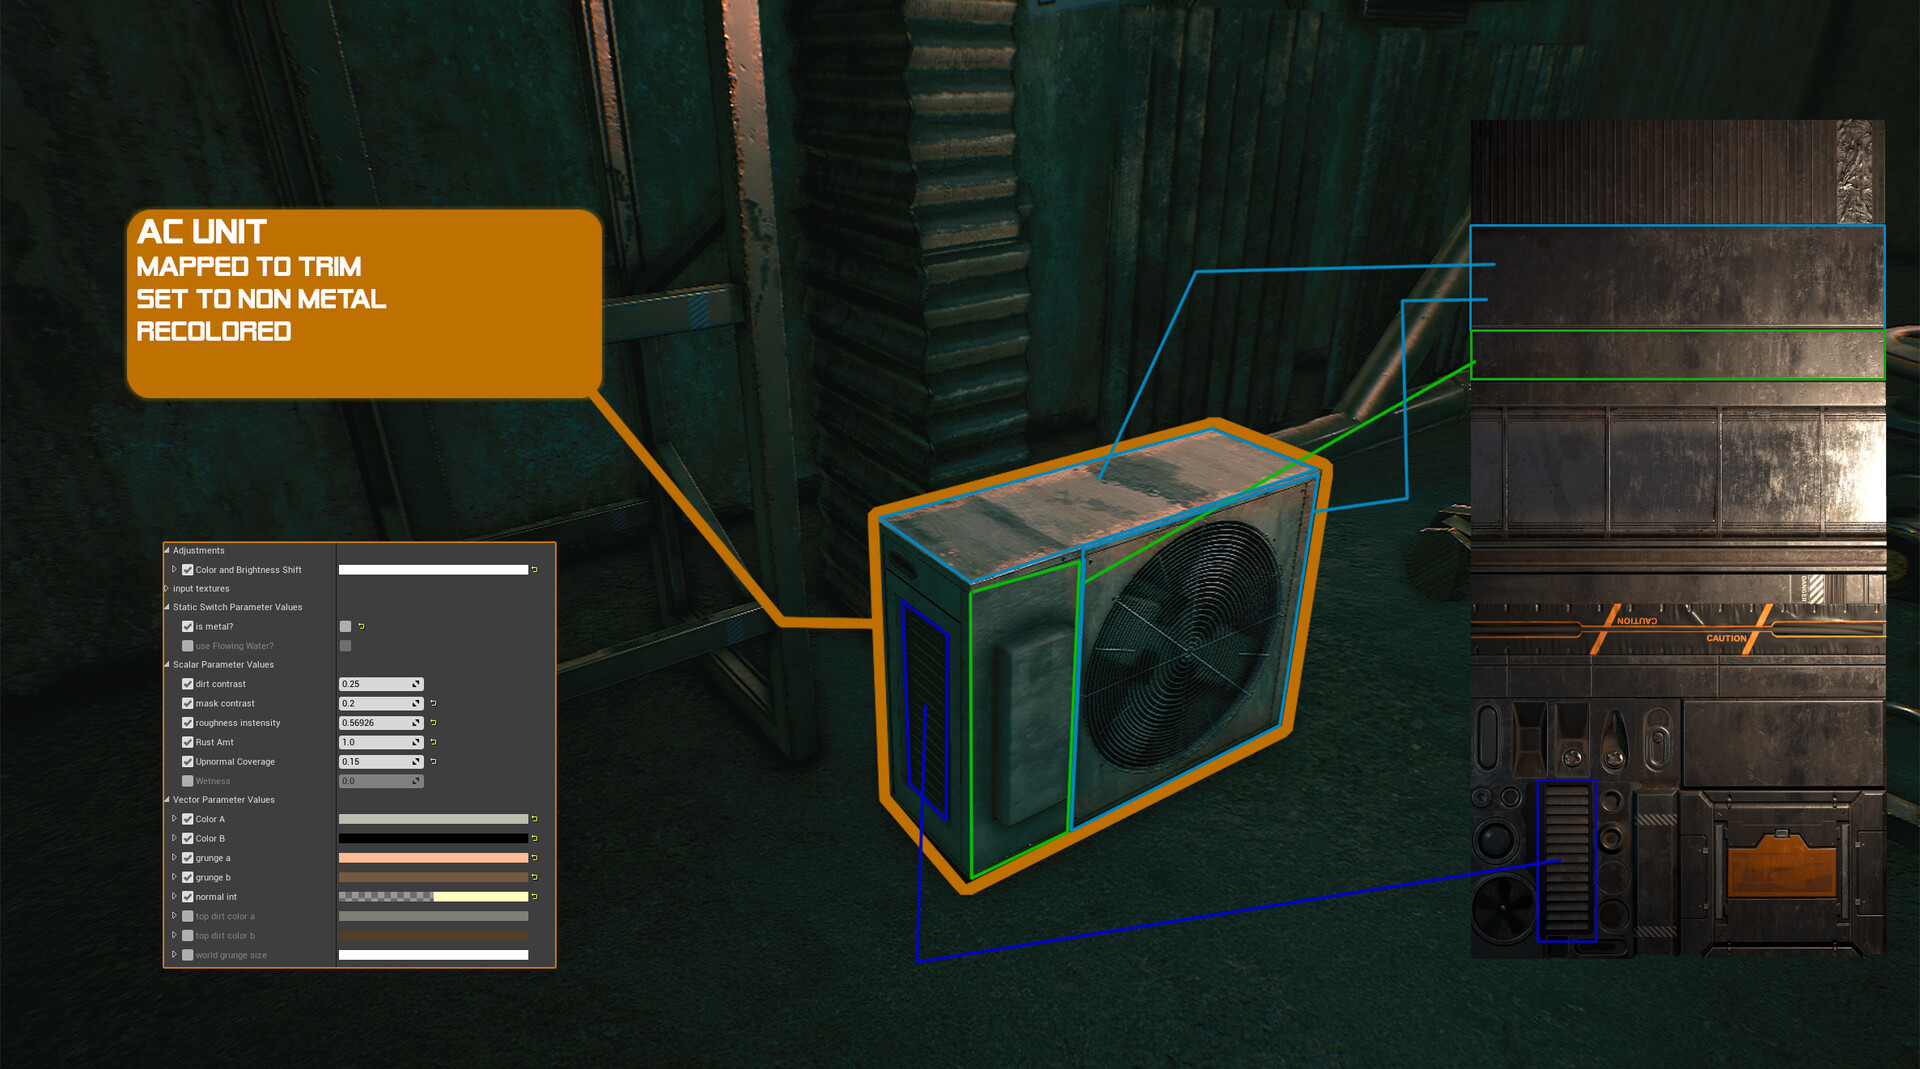
Using this setup, I can make a lot of controls for my neon with the material instances. If nothing else, I wish I had fewer instances. I made a bajillion just for controlling signs and it became a bit of a pain to work with.
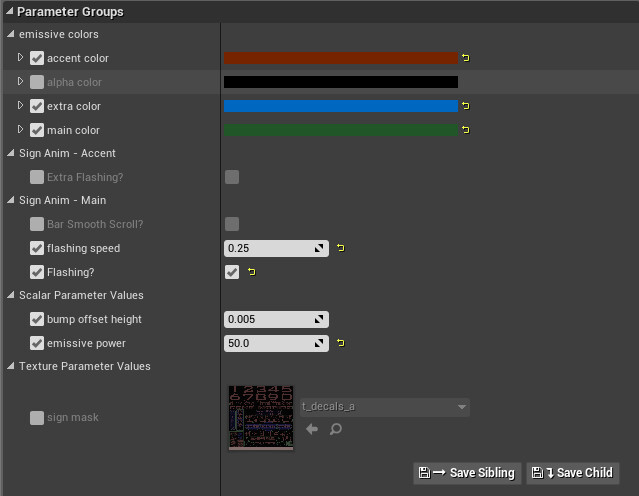
Ol' Parameter Pitts, that's what they call me
For the geo, I created mostly simple cards. Some signs also had metal backings created using the uber trim. Tbh, I really only scratched the surface here and next time I'd like to take my treatments further. Even so, with my simple setup I could get effects like this with just a few parameter customizations
I think that's about it for this. If you're interested in seeing a particular breakdown, just ask and I'll do what I can for next time.
Thanks for reading and see ya next week!