Sorry for the absence! Now let's get to work.
I'll be adding new parts once a week. We'll start with the uber trim since that seems to be what most are interested in.
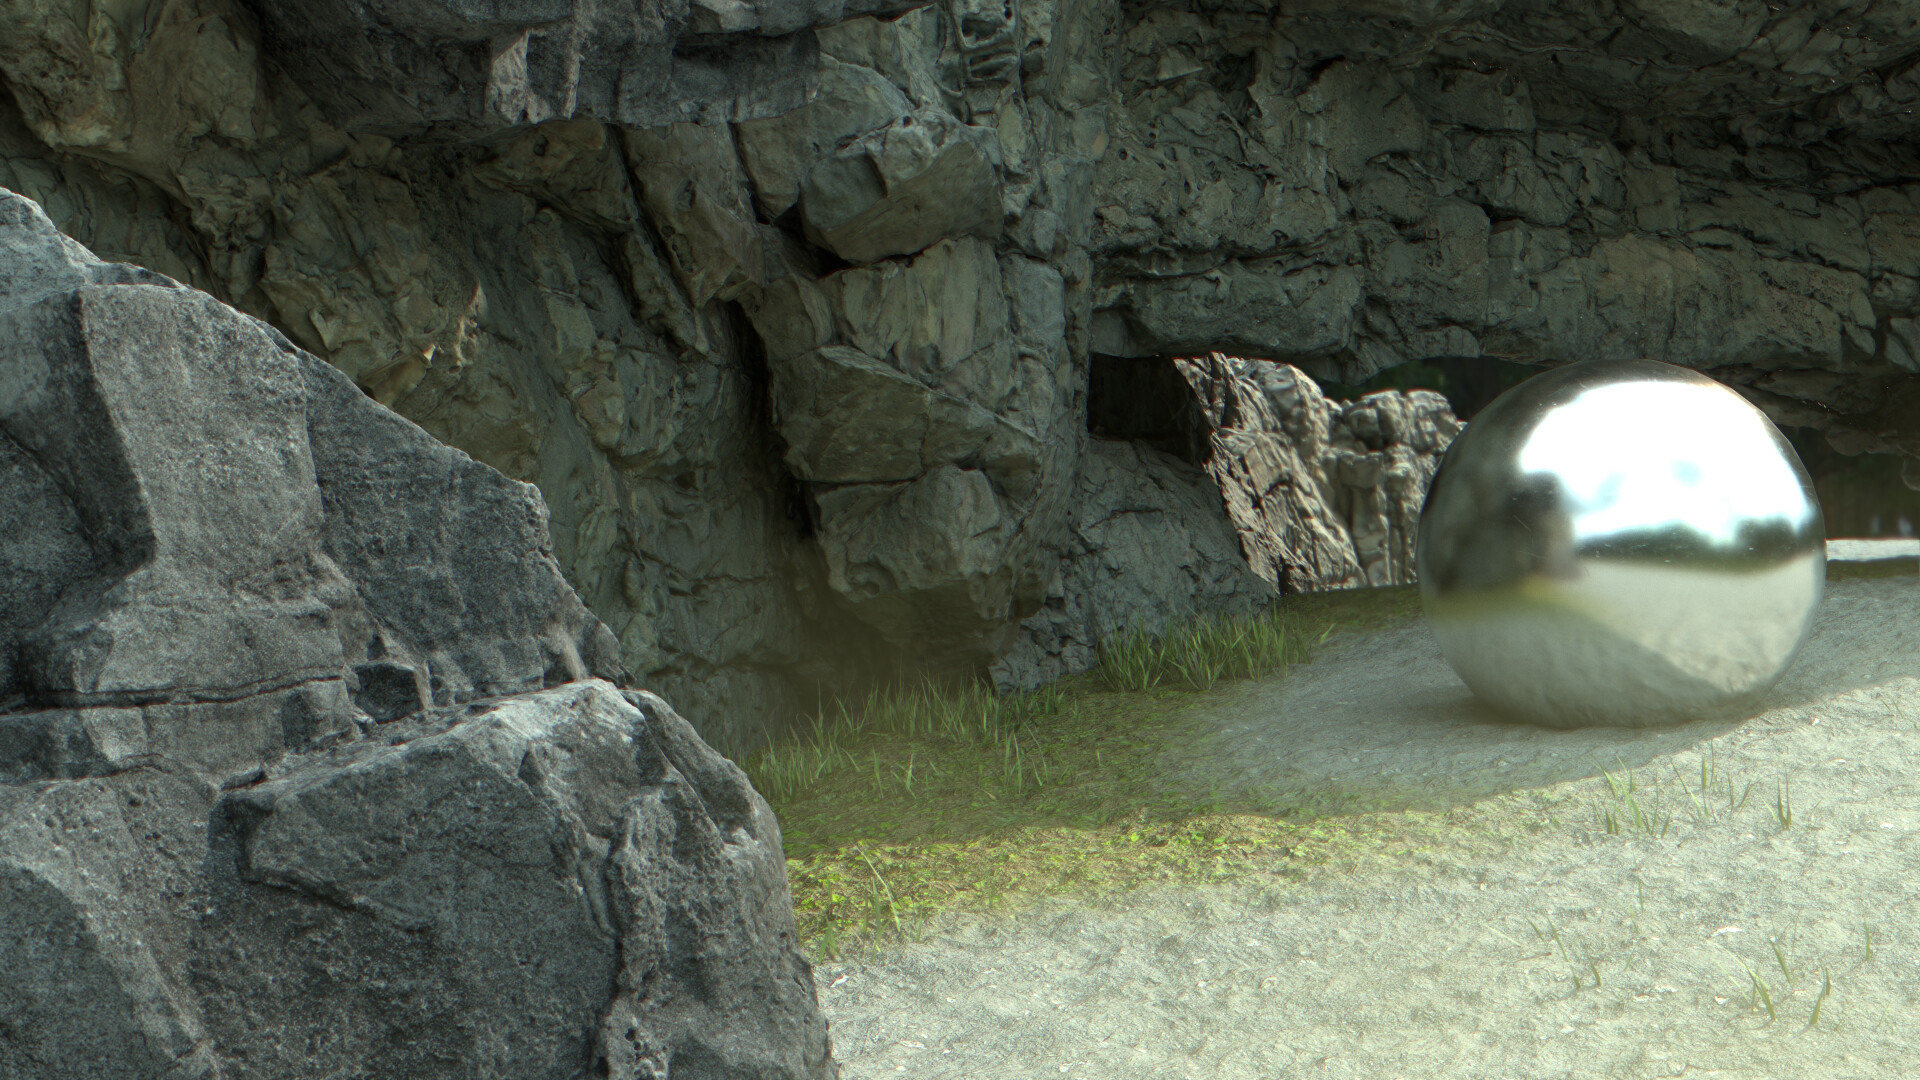
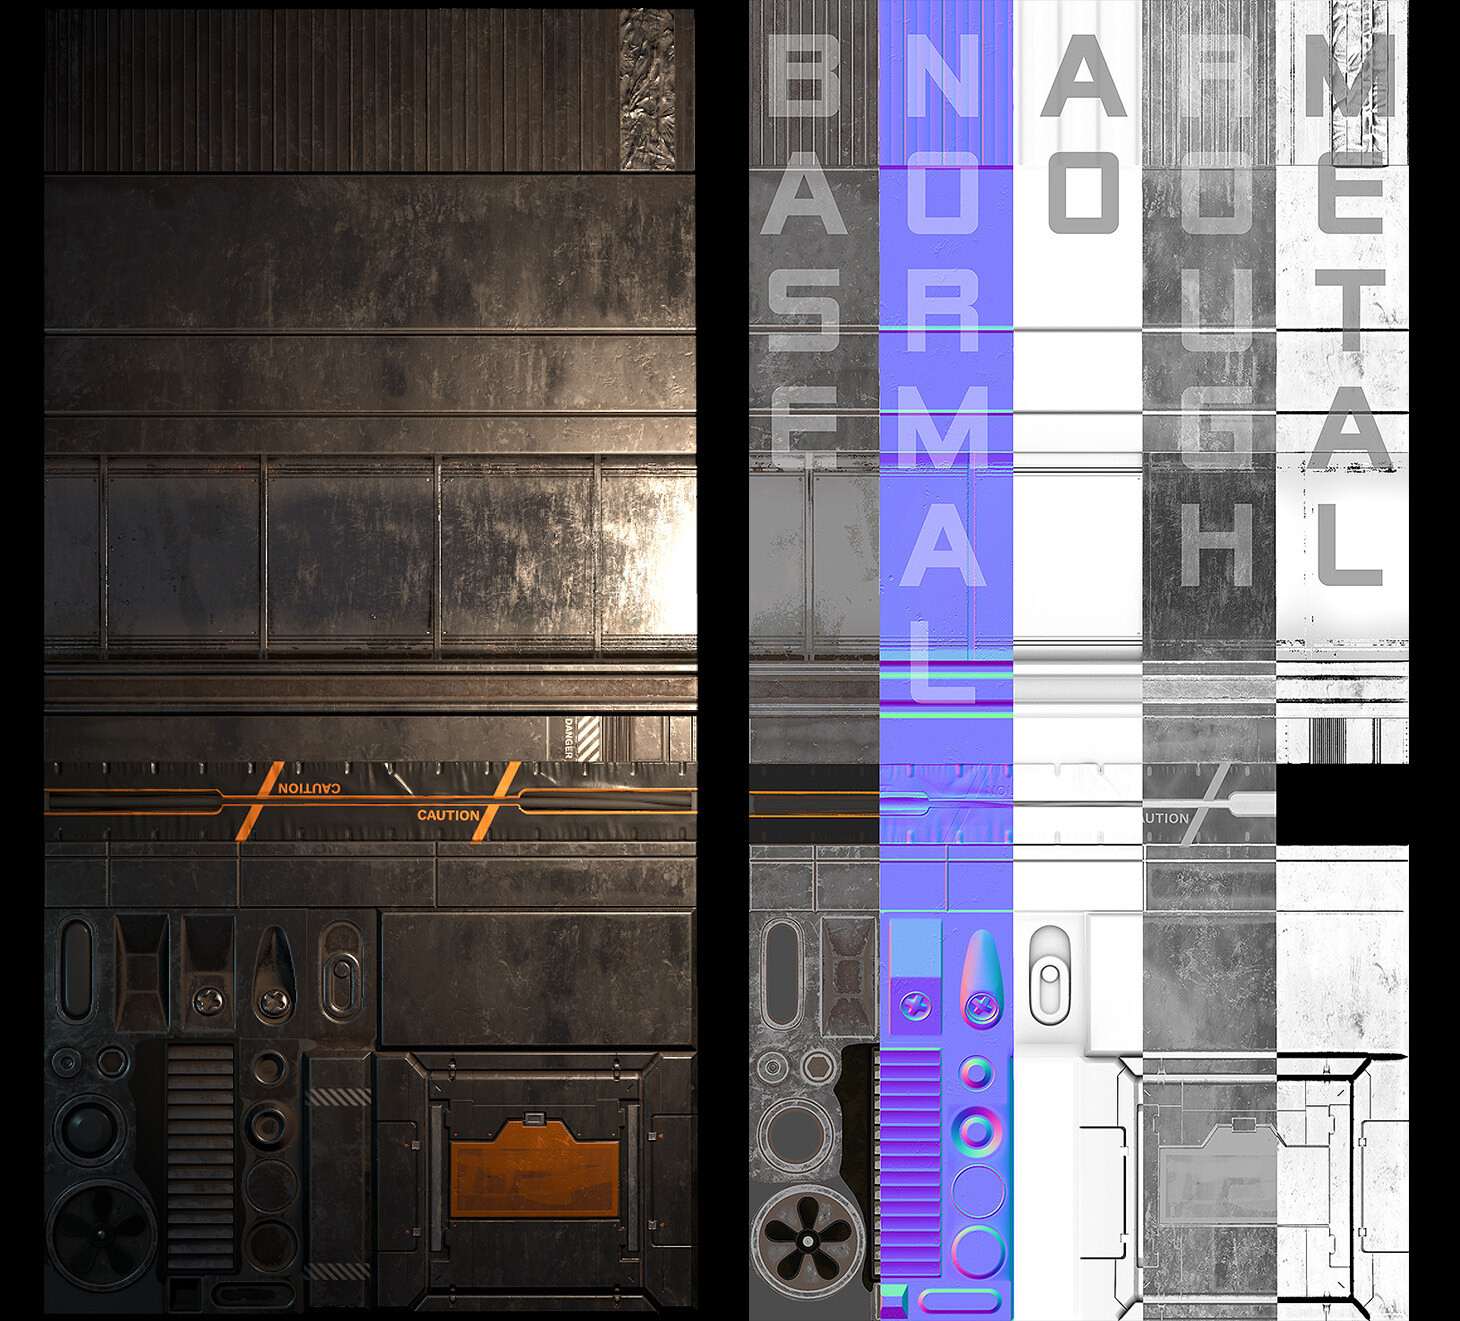
First: here's the full trim sheet.
This is the full texture and the full texture set.
Now let's see how I got there.
Planning
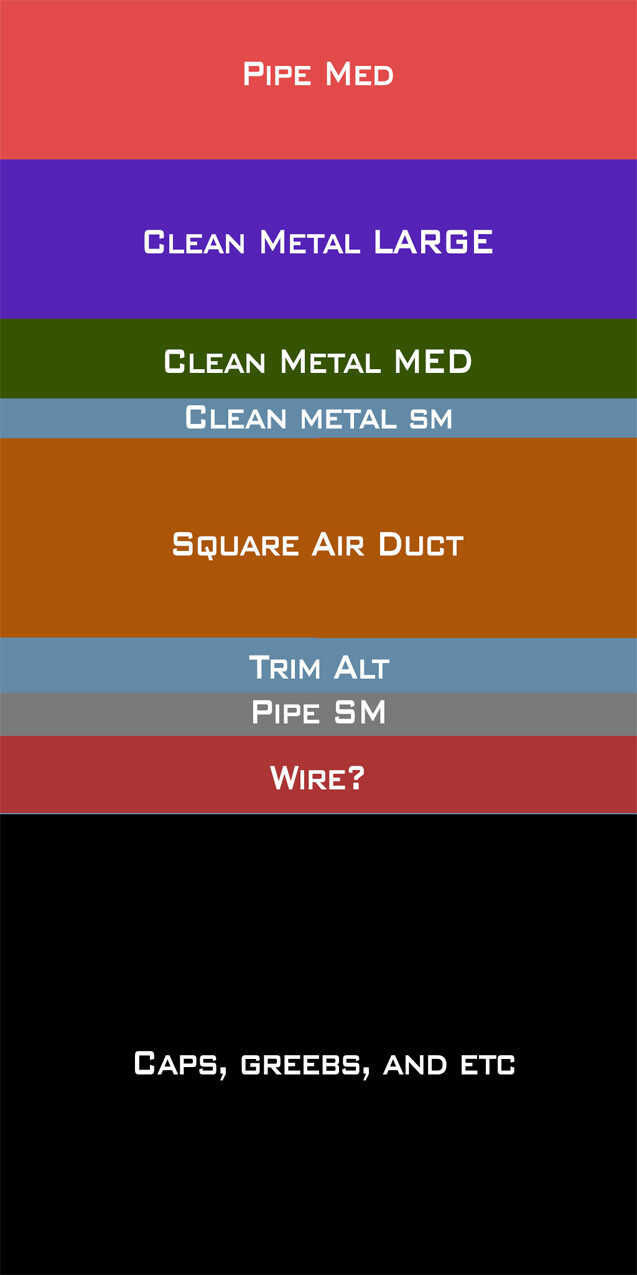
In my planning I desired clean, readable, and multi-use trims with different bevels, and pretty even texel density. For me this meant planning different sizes for trims and cap trims. I made this blockout early on and stuck pretty closely to the sizes here. The final shapes on the trim come from a wealth of reference of alleys and the structures you find in them. All in all, it's pretty no frills which is exactly what I wanted. The real strength of this trim is its versatility. The end result looks fine, but really it's just the base. In Unreal, I'll let the shader take over and make it really useful.
Creation
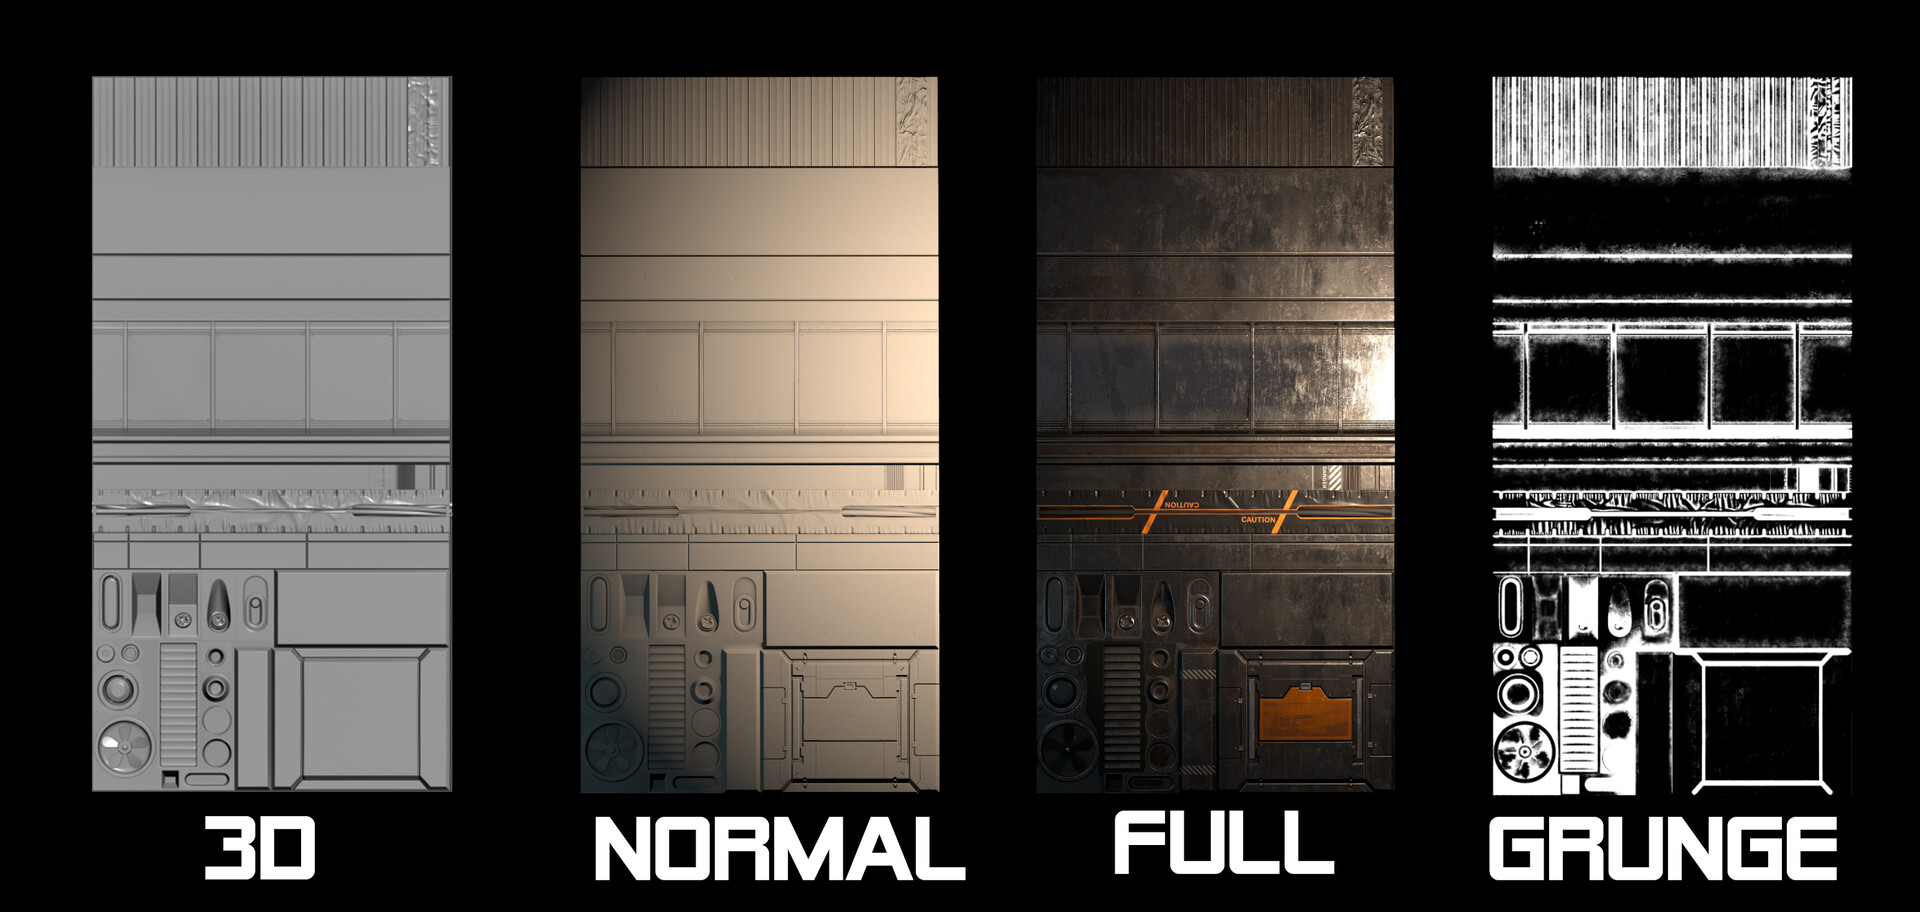
This is pretty straight forward. The sheet itself is modeled in 3D then baked down and painted in Substance Painter. Some of this work was also done in Zbrush where appropriate like sculpting organic folds. I then added some micro height details and decals in Painter to get the final normal map. When ready for export, I used a custom preset that creates a channel pack map (I call this AORM, R=AO, G=Roughness, B=Metalness, and there's an optional Alpha used in this case for a separate height-based Grunge generated using the height and normal of the the trim sheet geo.) At the end of that, I have a base color, a normal map, and an AORM texture with a height-based grunge packed in the alpha.
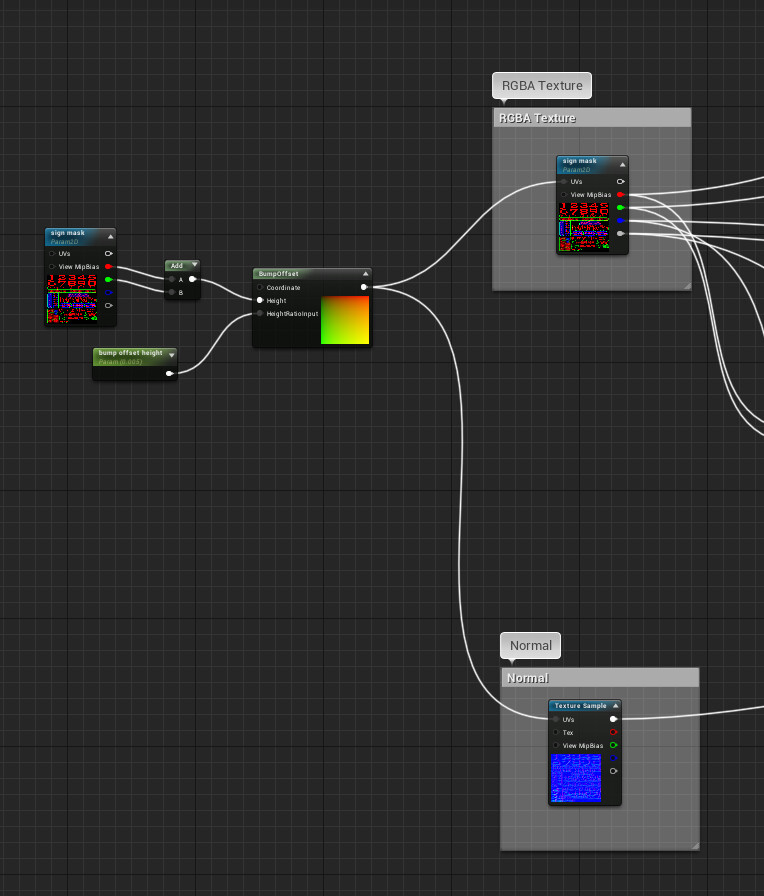
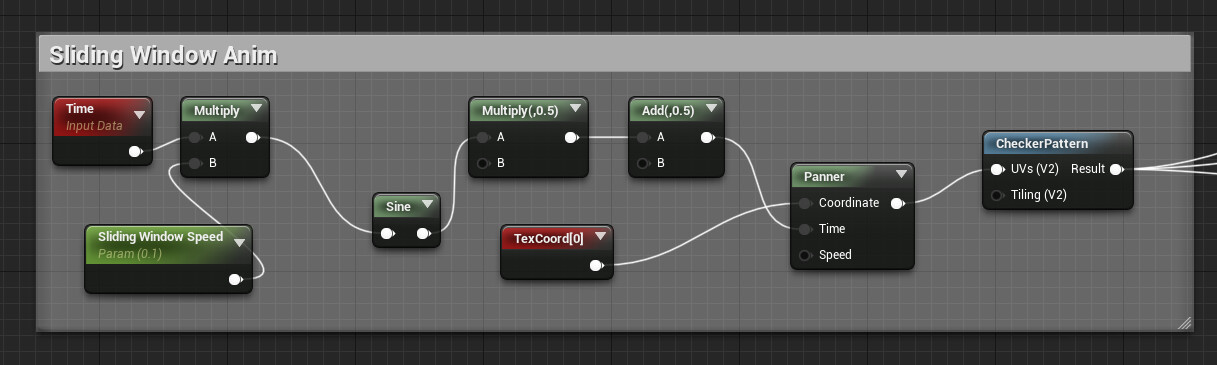
Shader
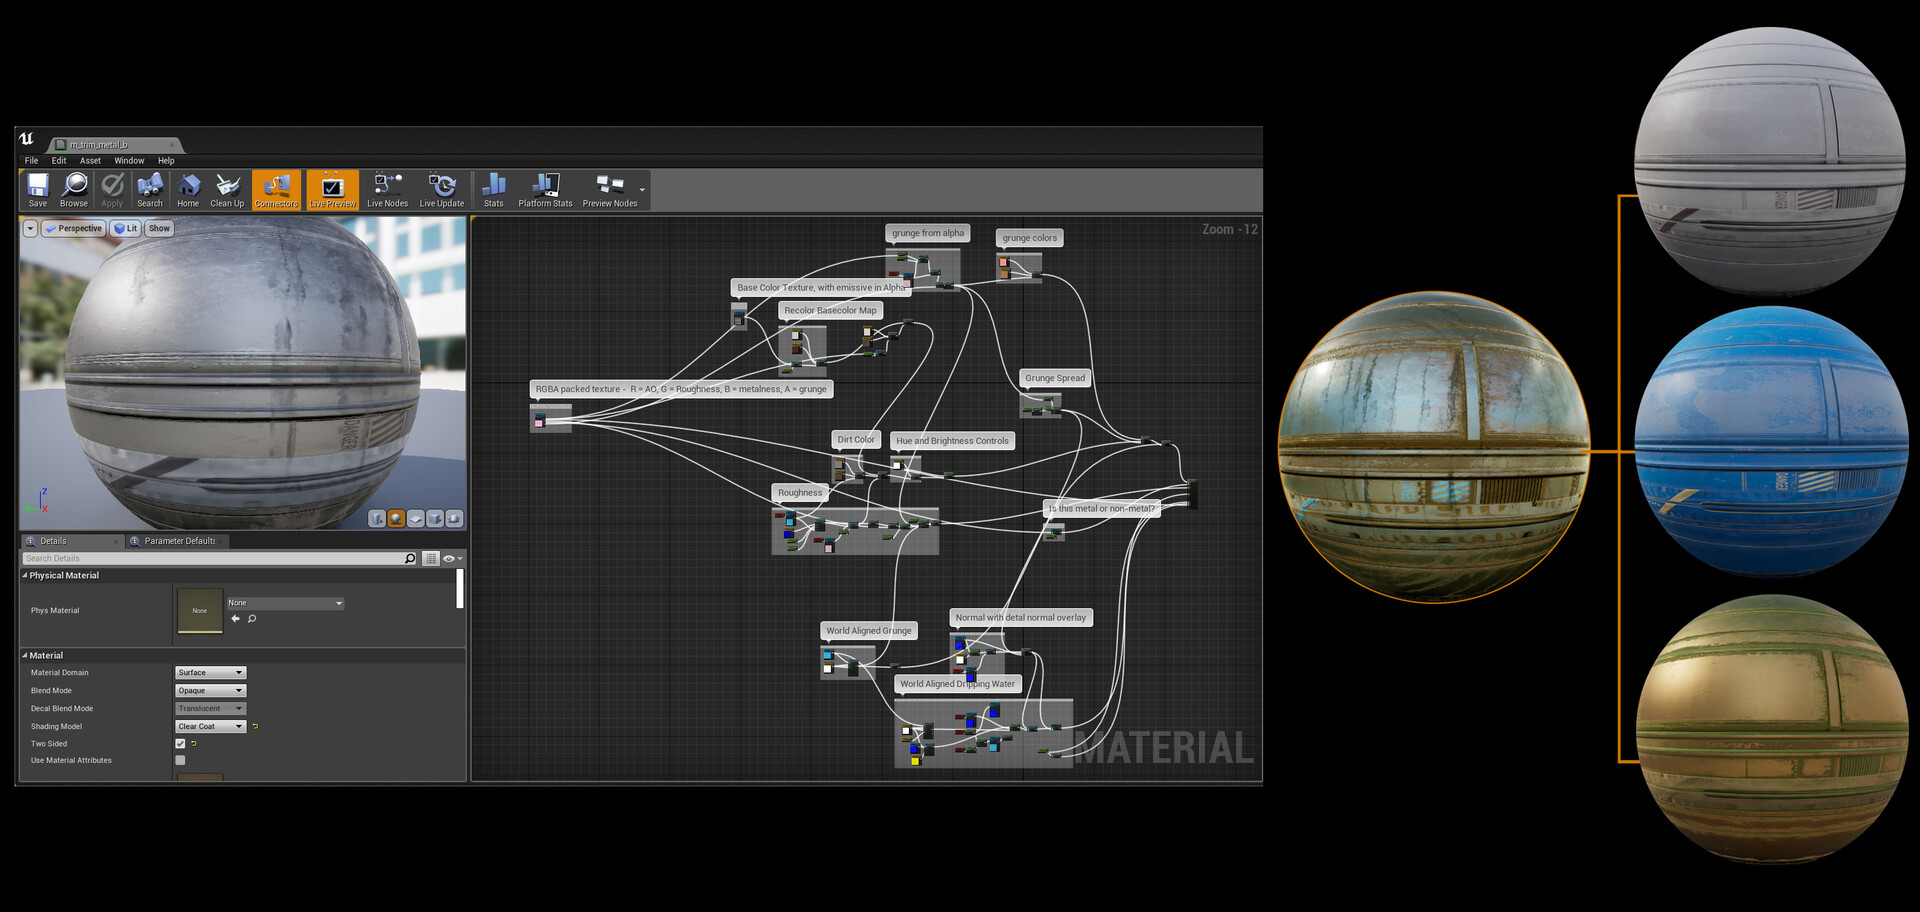
Here's where magic happens.
So in the planning stage, I kept things pretty readable and avoided heavy grunge passes. Here I add those passes.
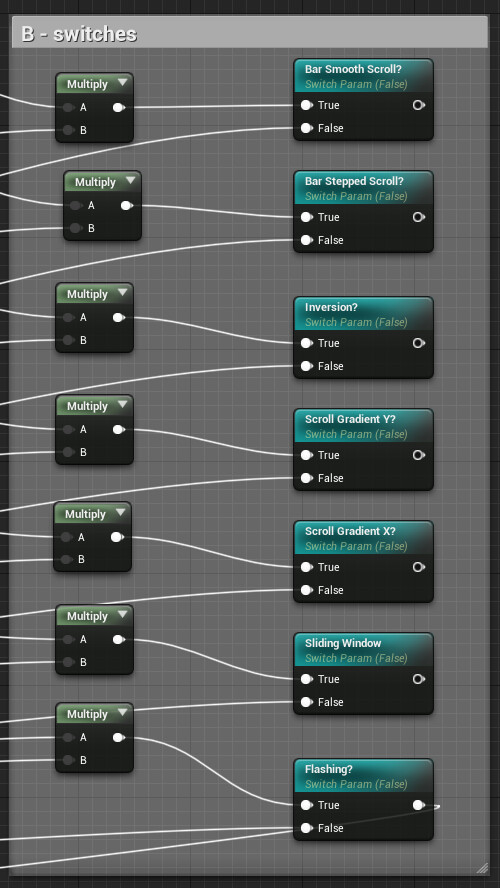
Adding grunge in the shader has some neat benefits. I keep grunge type and colors consistent among a large number of assets, I can change these parameters as my scene evolves, and I can have a layer of unified density of detail. (You may notice there's also a "world aligned dripping water". This is an extra layer to support rainfall that I didn't end up using on most of the trims and I'll cover that in a later post. This is also why in this screenshot, the material is set to Clearcoat. Clearcoat is not at all necessary for the trim to function.)
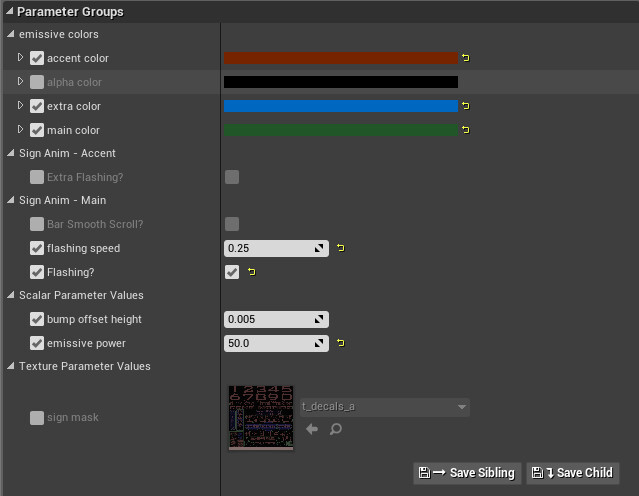
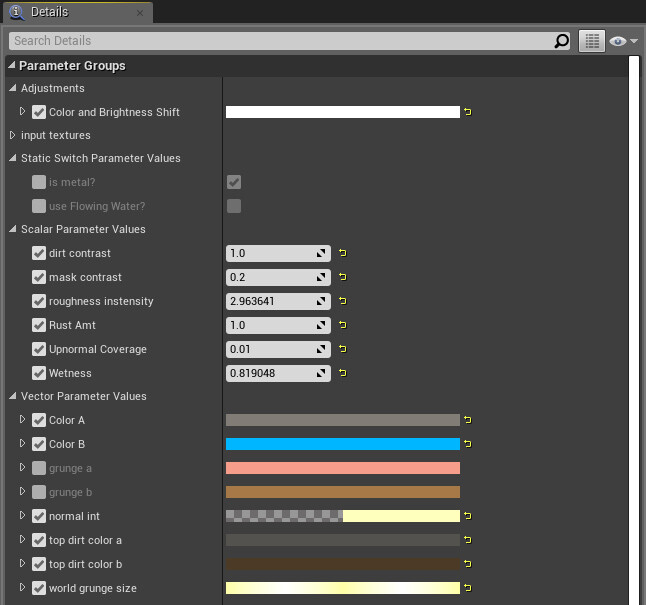
I also add controls for that grunge in the form of exposed paramters. I care about controlling the amount of grunge, density, grunge mask edge contrast, upnormal spread, and color of every grunge pass so I expose them as parameters. I also expose roughness and metalness. Separate color controls allow me to recolor grunge or the trim itself. In this way I can produce materials like bronze, gold, iron, etc with grunges that resemble mud, dirt, rust, light moss, or no grunge at all. With the metalness control, I can easily switch the shader to be a non-metal giving me options for plastics, rubber, etc. Add some roughness control, and I get essentially a full set of in-shader controls to help keep any change I do PBR legal. (Again you see "use Flowing Water" related to rain controls which I'll cover in a later post.)
For other grunge in the scene, I used channel packed grunge maps. RBG all have different grayscale tileable noises made in Substance Designer. These grunge maps are key to just about every material in my scene because they're used for a lot more than just adding grunge. They are also being used to break up gradients and add res to otherwise lower res masks.
The grunge passes are as follows:
A Height-based grunge (fits the normal map shapes. Reminder that you can scroll up to see this mask)
An Upnormal Grunge (sits on top of the object)
A World aligned texture (mostly for streaks/directional grunge on the sides of objects)
The world aligned and upnormal grunge use different RGB channels of the same texture. The height-based grunge is channel packed in the alpha of a texture I'm using anyway (in this case the alpha of the AORM of the trim texture).
This is the grunge texture used for the vast majority of world-aligned and upnormal grunge:
So here's an example of these things in action.
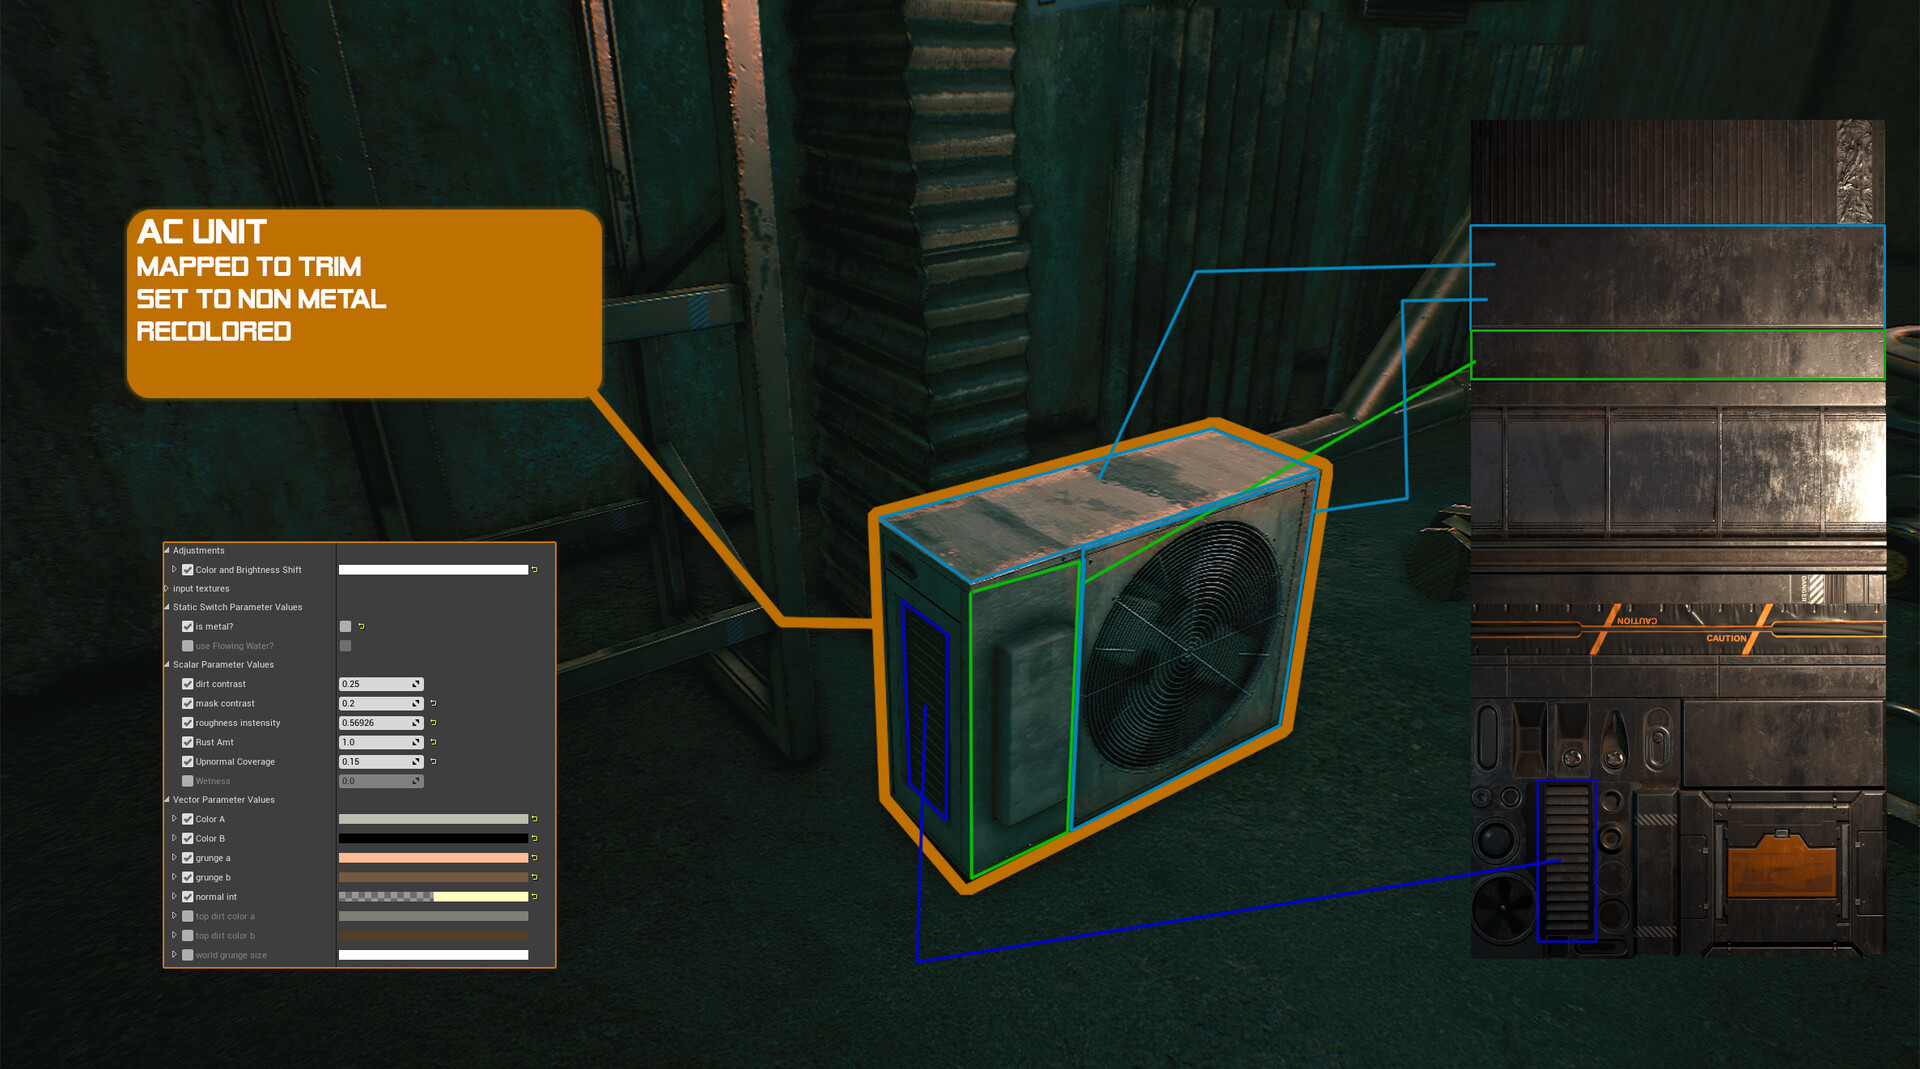
First the air conditioner is mapped to different areas of the trim. Here are some callouts. You can see that I changed the color of the trim to be off-white and reduced the roughness of the "painted" areas. The edges of the mesh look different because I'm using the height-based grunge to control what goes on in there. This means that as long as I mapped it appropriately to the trim, I get a different treatment for the edges of my object to play with things like edge wear in the shader. The grunge pass here is pretty light. You can see some sitting on top of the AC unit and a bit on the sides. These are world-aligned so they show up based on the position of the object in the scene. In my key shot of the window (https://www.artstation.com/artwork/Z5RPlm , "Still Shot 3") the grunge appears to leak from inside the fan. This is merely me positioning the AC unit mesh to make sure the world space grunge would layer over it that way. And in case you're wondering, the front grate comes from a separate atlas with alpha test.
Here are some examples:
And here's some grunge positioning:

I think that's about it for this. If you're interested in seeing a particular breakdown, just ask and I'll do what I can for next time.
Thanks for reading and see ya next week!